What a day for me in the shop. I finished the saw donkeys just after lunch and then I went to Aubochon Hardware to get my grinding stone. Once I got back to the shop with it I was being pulled and tugged in exactly 23 bazillion different directions. I never got around to prioritizing my project list so I ruminating in the brain bucket as to which one to start next. The grinding stone was in my hands so that was the leading candidate but I put that away in the drawer for later.
I picked a leader of the pack and it's woodworking related but not working wood. It's been an annoyance that I am going to try and fix. I'll be starting that tomorrow morning. And since my wife is going to Canada (visit relatives) before coming home from the west coast, I can make all the noise I want. I'm sure I will be keeping up a steady stream of expletives too.
 |
| can you see 9 dowels here? |
This chunk of red oak has been floating around the shop for years and today it has a use. I need 8 dowels and one spare for draw boring my saw donkeys. I didn't want to use douglas fir because for this purpose I think it's too soft. I had a choice of white oak too but I passed on that one due it being sawn stock 1/2" thick.
 |
| I'm splitting my dowels out to get the strength |
 |
| yield from the first 4" board |
I got 9 pieces but only 4 are usable with one being iffy. I sawed off another 4 inch piece and split out a few more. I'm making them 4" because the saw donkey stock is 3 1/4" square.
 |
| I got enough split stock now |
The pile on the left is to make into 3/8" dowels and the pile on the right is dowel stock for a future project. I can get a lot of 1/4" dowels out of that but I'll probably forget where I stowed them.
 |
| one down and 8 to go |
I split these out again to get them closer to the 3/8" dowel size I want. I also planed the corners off and pointed one end with a chisel before I beat them through the dowel plate.
 |
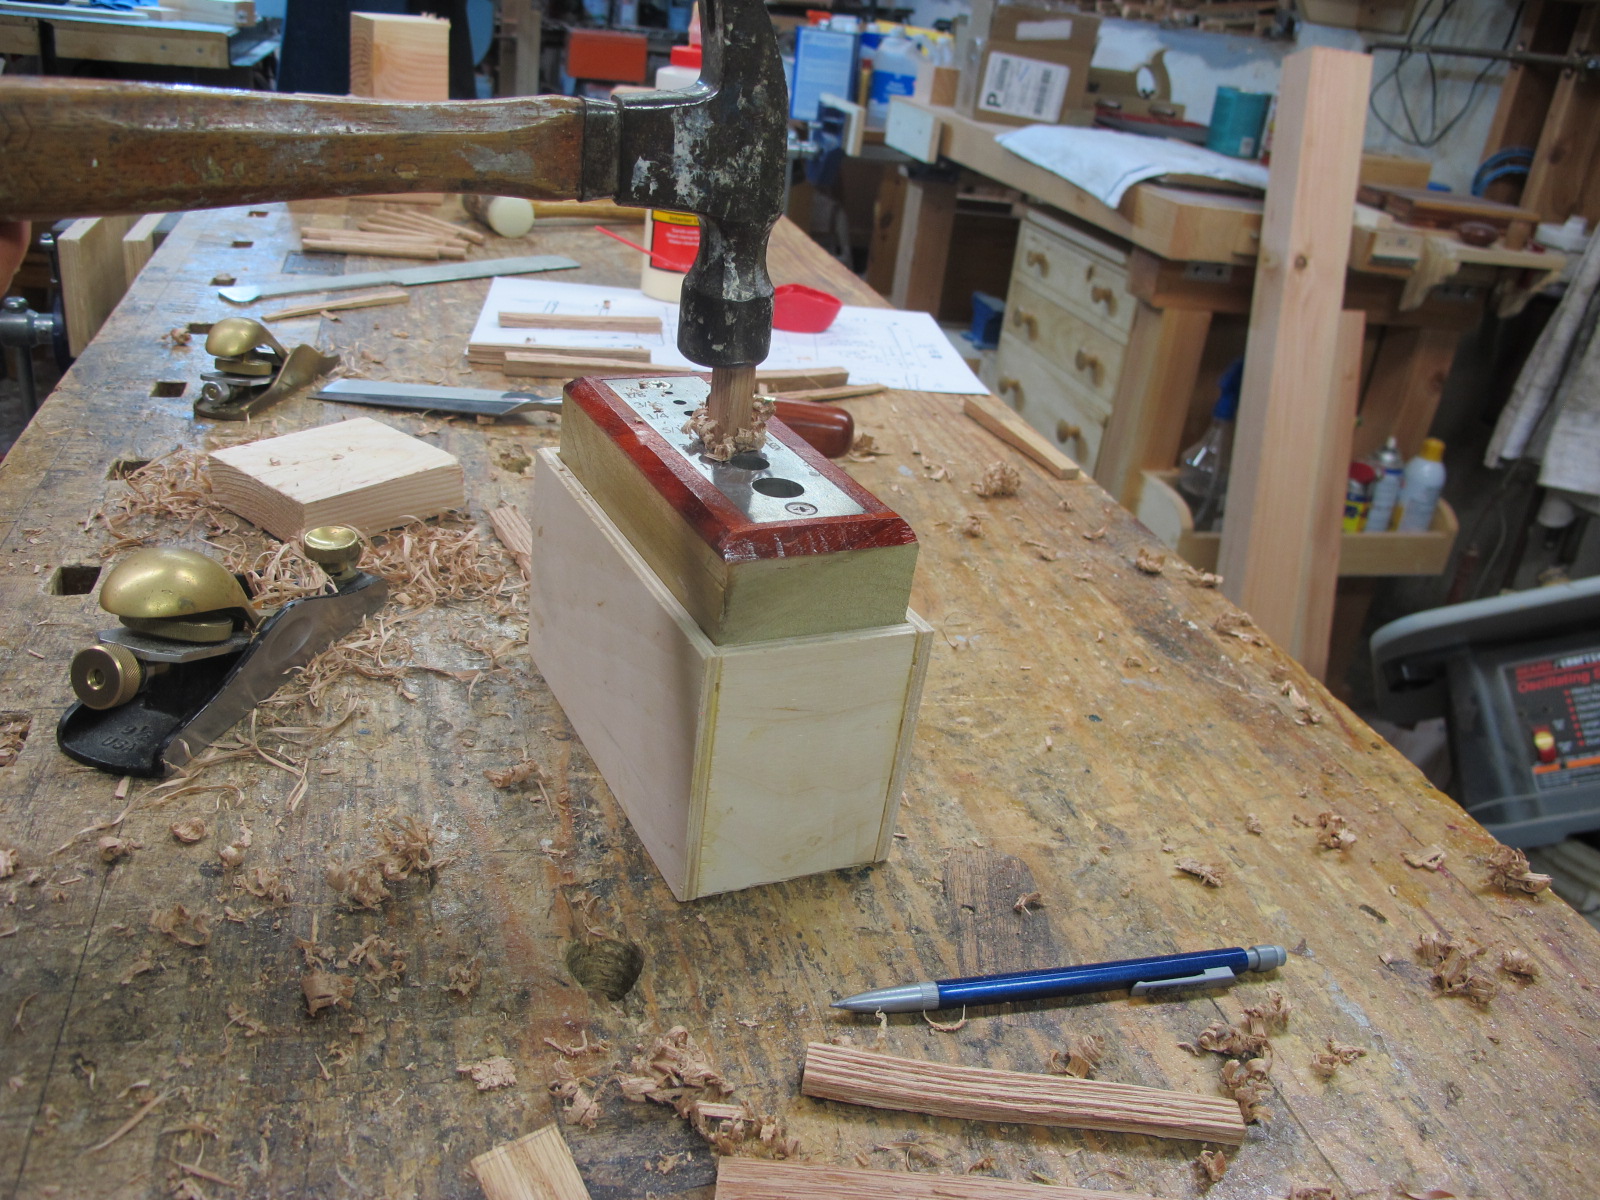
| beating them through |
Getting these closer to 3/8" payed off here as I was able to get my dowels on the first pass. In the past I would have started with a larger hole size and work down to the one I wanted. The pre-work made this go very quickly.
 |
| unusable |
I can't get my 3/8" dowels out of these. On the second split I did, they came out too thin but I can get 5/16" and 1/4" dowels out of these.
 |
| 9 dowels ready to go |
 |
| self supporting |
All of my mortise and tenons on this saw donkey are snug and self supporting.
 |
| this saw donkey isn't fully self supporting |
|
|
It's either the mortise or the tenon on the right that is too loose. I can pick it up but it falls apart almost right away. I'll be draw boring this one first.
 |
| cheek off cuts |
I saved a few of the cheek off cuts for this. I put a piece in the mortise so when I drill the hole for the dowel I won't get any blow out.
 |
| marking the tenon |
I clamped the mortise and tenon before I marked the tenon. I am only using one dowel for each M/T connection and I wanted it be as tight as I could get it.
 |
| offsetting my hole in the tenon |
 |
| knocking the first one in |
This is the loose M/T connection. I have read that with draw boring that the fit of the mortise and tenon doesn't' have to be dead on. I was anxious to see how this one came out.
 |
| the exit end looks like crap |
I had to beat this one hard to get it to go through. I could also see the tenon being pulled into the mortise as I hit the dowel. I think part of my problem with getting this dowel to pass through was that I didn't put a pencil point on this end. I didn't think to do it before I started.
I sawed this frayed end off and it was solid down by foot so at least that didn't bite me on the butt.
 |
| let's say WOW together |
I simply am dumbfounded by how incredibly tight and stiff the draw boring made this. I was planning of putting X braces on this but not anymore. This saw donkey is as solid as a 30 ton boulder. There is zero wobble or weeble in any direction. I expected the saw donkey to stiffen up some but not like this. Now I know why Richard didn't put X braces on his saw donkeys.
 |
| I pointed the dowels for the 2nd saw donkey draw boring |
Another thing I did was that I didn't make the offset as big as I did on the first set. The second saw donkey is stiff nonetheless. I'm sure the fit of the joints helped too. I thought by using less of a offset I wouldn't get that frayed dowel end again. Next time, I'll go with the slightly larger offset to get a tighter draw bore.
I also glued the saw donkeys with hide glue. I set them aside to cook and I will check them out tomorrow. I have a couple of tenons to flush and I also want to plane off the sharp edges.
 |
| one direction I got pulled in |
I got the bushings with the grinding wheel but I was not expecting plastic. I guess I am a dinosaur because I really thought that they would be metal. These worked and I had to use two of them to get the correct size for my grinding wheel shaft.
 |
| it works |
This wheel keeps on spinning for a very long time after I stop turning the crank. Now that I have a wheel and a source to buy replacements, I have to make something to attach it to. I also have to make some kind of an adjustable angled platform as a tool rest. Just doing this would keep busy for a few weeks. I put this away in a drawer till I can come back to it.
 |
| I just ordered this |
I have given up trying to find a set of old pig stickers so I'm going the new route via TFWW (Tools For Working Wood). I am starting with the 1/4" size and the next one will be the 3/8" one. These are the two most common sizes I use and based on how I like them, I'll add the others.
I just ordered this on thursday and I got it today via the USPS. This was totally unexpected as I was looking forward to playing with this next week sometime. The good thing is that TFWW has all the sizes in stock right now. My plan is to add a chisel every other payday because they ain't cheap. This 1/4" one set me back $77 and the 3/8" one is similarly priced.
 |
| I had to road test it |
This made a much better looking mortise than my electron munching mortiser did. First impressions on the chisel are very favorable. I like the size and heft of the wooden handle but I have some work to do on the business end. I can see grind marks and the edge isn't square. I may not be able to sleep tonight thinking about this. Another thing I set aside for now so I could deal with something else.
 |
| I need some wedges |
I have never tried to make small wedges by hand before. Usually I would buy the shim packs from the big box stores but not here. I want these as they will be a better match for where I intend to use them.
 |
| not too bad |
This wedge is about 2 1/4" wide and 1 3/4" long. I need four of them. The second set was slightly larger and I sawed them out corner to corner. The first ones I sawed about 3/4 of the length - what you see in the vise.
 |
| cleaning the saw cuts |
 |
| blurry pic of 4 wedges |
 |
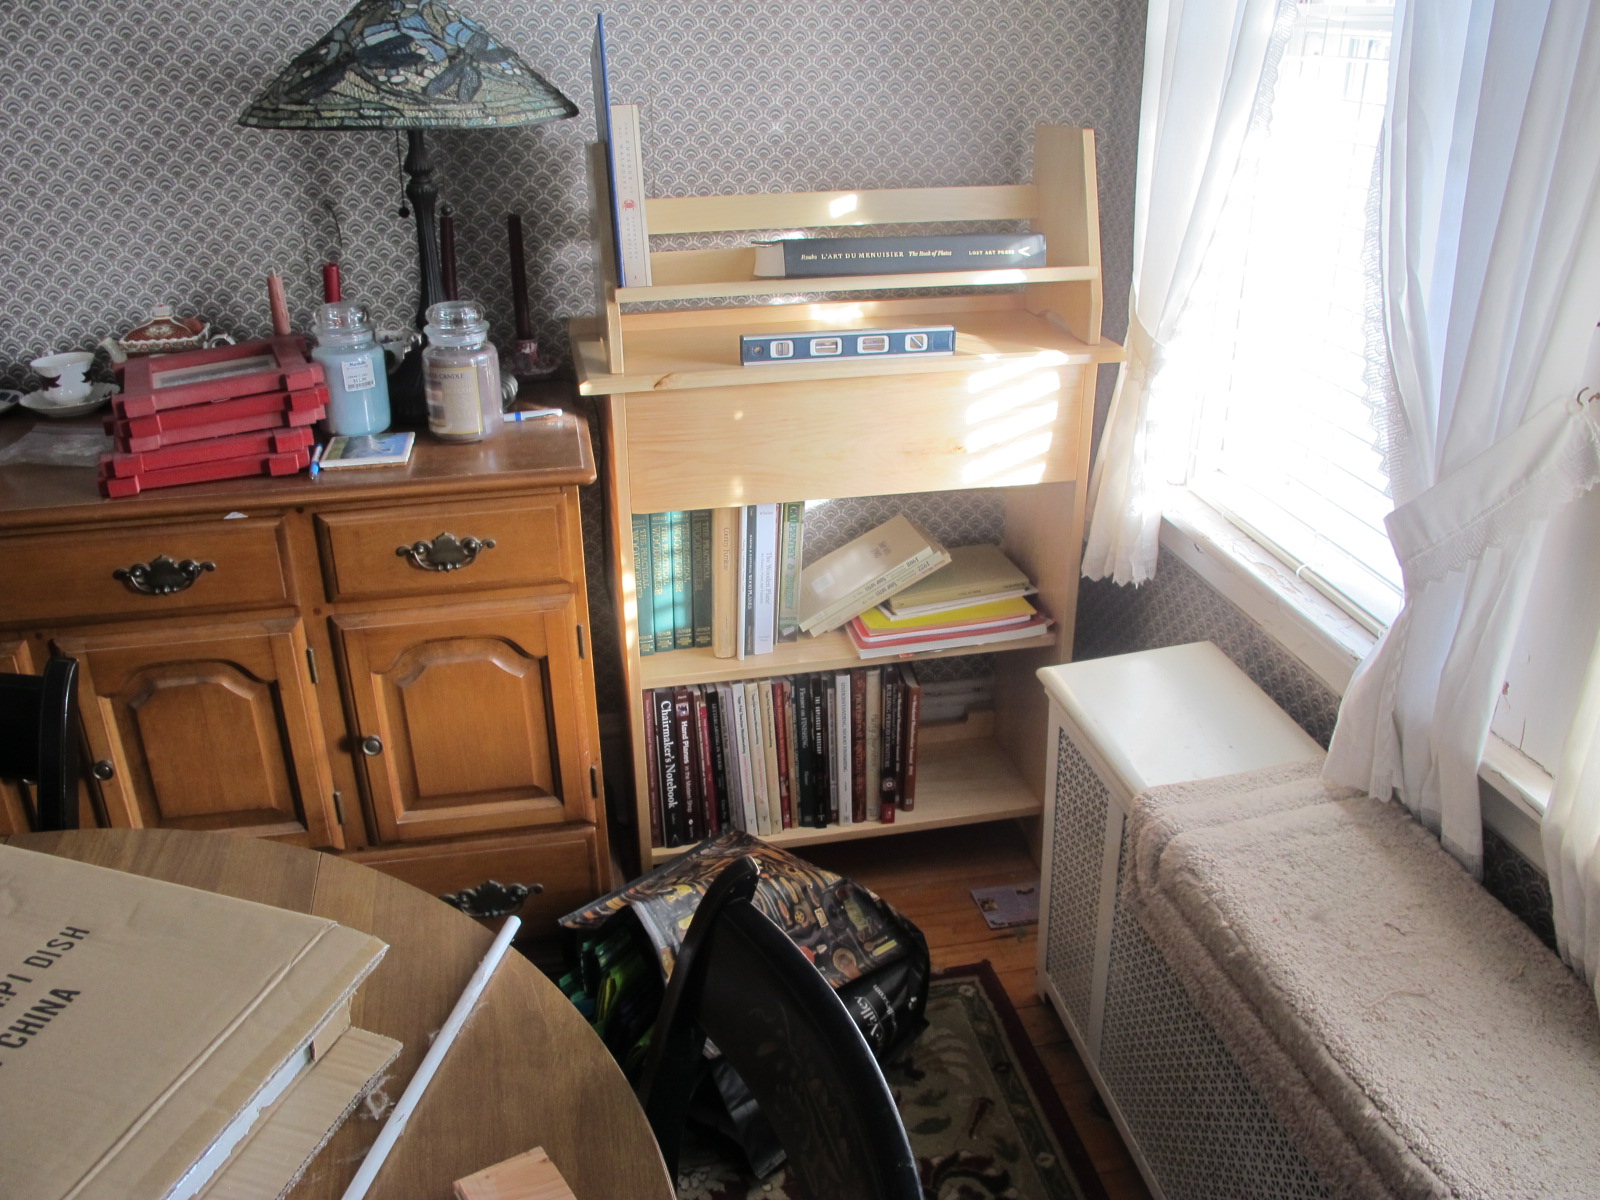
| where I'm using them |
This is the bookcase I just made. After putting it where it's home is, I found out that floor slopes from the outside wall toward the middle of the house. This dip and resulting slanted bookcase has been bugging me ever since then. I am reminded of it every time I glanced at it - it's to the left of my desk. The bookcase I fix right now and the floor I can live with.
 |
| the left side is down almost a 1/4" |
I never noticed this before. I think it's because the buffet is so long.
 |
| where I used the shims |
I put a set of these under both feet. I don't expect to do this again as this will probably never get moved from here.
 |
| the bug has been squashed |
 |
| I've been meaning to do this seemingly forever |
The edge on this froe is rounded and it should be more pointed. I filed both sides from the cutting edge going up to the top. I think I made an improvement but I'm not sure how a froe should be sharpened or how it's edge is formed. My thinking is that if the edge is vee shaped vice rounded/oval shaped, it should split better. We'll see.
 |
| I missed the before pic |
I can see a difference in the edge here. I still haven't heat treated this yet. I have been able to split out stock for dowels since I made it. So as long as I can do that, I'll put off the heat treatment.
 |
| sunday's #1 job |
I have a ton of other little things to do that are driving me batty trying to pick one to start with. I am starting with this vise. It's a quick release vise that does not quick release all that nicely. The closer the jaws are together, the harder it is to open on the quick release. The farther apart the jaws are the easier it is to open more. It works but not as smoothly as I would like it to. This is the one I use the most so it's time to put everything else on hold and fix this once and for all.
 |
| my sharpening bench vise |
I had bought this one first to use on here. It works great. The quick release on this is as smooth as can be. No problems with the quick release working at any position of the jaws. It was because of how this worked that I bought the second one for my workbench. I want that one to work as smoothly as this one.
Tomorrow I am going to take both vises off and compare them and figure out why one works great and the other is so-so. This will be the first non woodworking project of the new year. Stay tuned for all the action and pics.
accidental woodworker
trivia corner
What is the Big Muddy?
answer - it's the nickname for the Mississippi River


0 komentar:
Posting Komentar